Custom Risk Boards
Tech Used: Photoshop, Illustrator
Introduction
I really enjoy playing Risk, but as you probably know, it takes awhile to play! As such, I made a few experimental rules to speed up gameplay and also add some more strategic depth to the otherwise simple classic.
Alongside experimental rules, which form a mod of Risk and turn it into a slightly different game, I made several custom Risk maps and had them professionally printed on boards for real play.
My primary interest in making custom Risk boards is educational.
I play Risk with my children, and I want them to learn about important geography, especially ancient geography. I have no doubt that they’ll master modern geography, but ancient geography can be more challenging to master. We came from our ancestors, so knowing the lay of the land in the past will not only help my children learn history, but also appreciate the ways in which the world has changed and how the land itself has shaped human conflict.
This focus on geography and history means that my custom maps feature much more detail visually than a regular Risk map. Cities, deserts, rivers, mountains, etc., all make an appearance on my maps, helping players understand the geographic restrictions and borders that made historical conflicts take the shapes they did. In addition, wilderness areas that prevented cities or armies from prospering in them feature themselves in one of the major game mechanics I created, called “Desolate Territories”. More on that below.
Rome, 0 AD
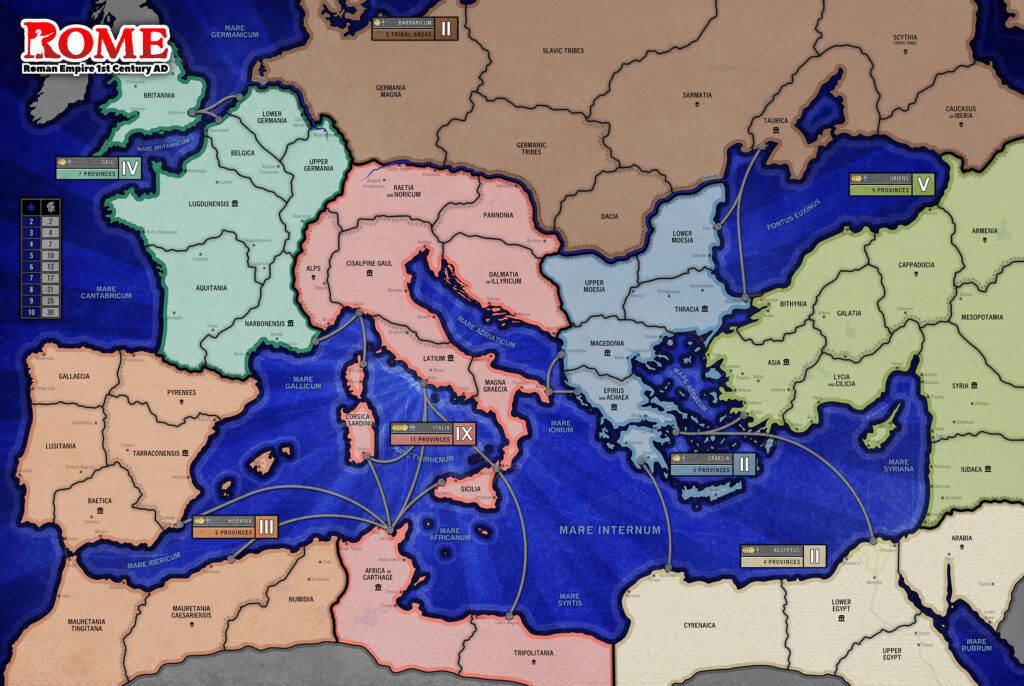
Roman Empire around 0 AD, split into 7 regions and 52 provinces or tribal regions- 10 more than regular Risk.
Persia, 500 BC
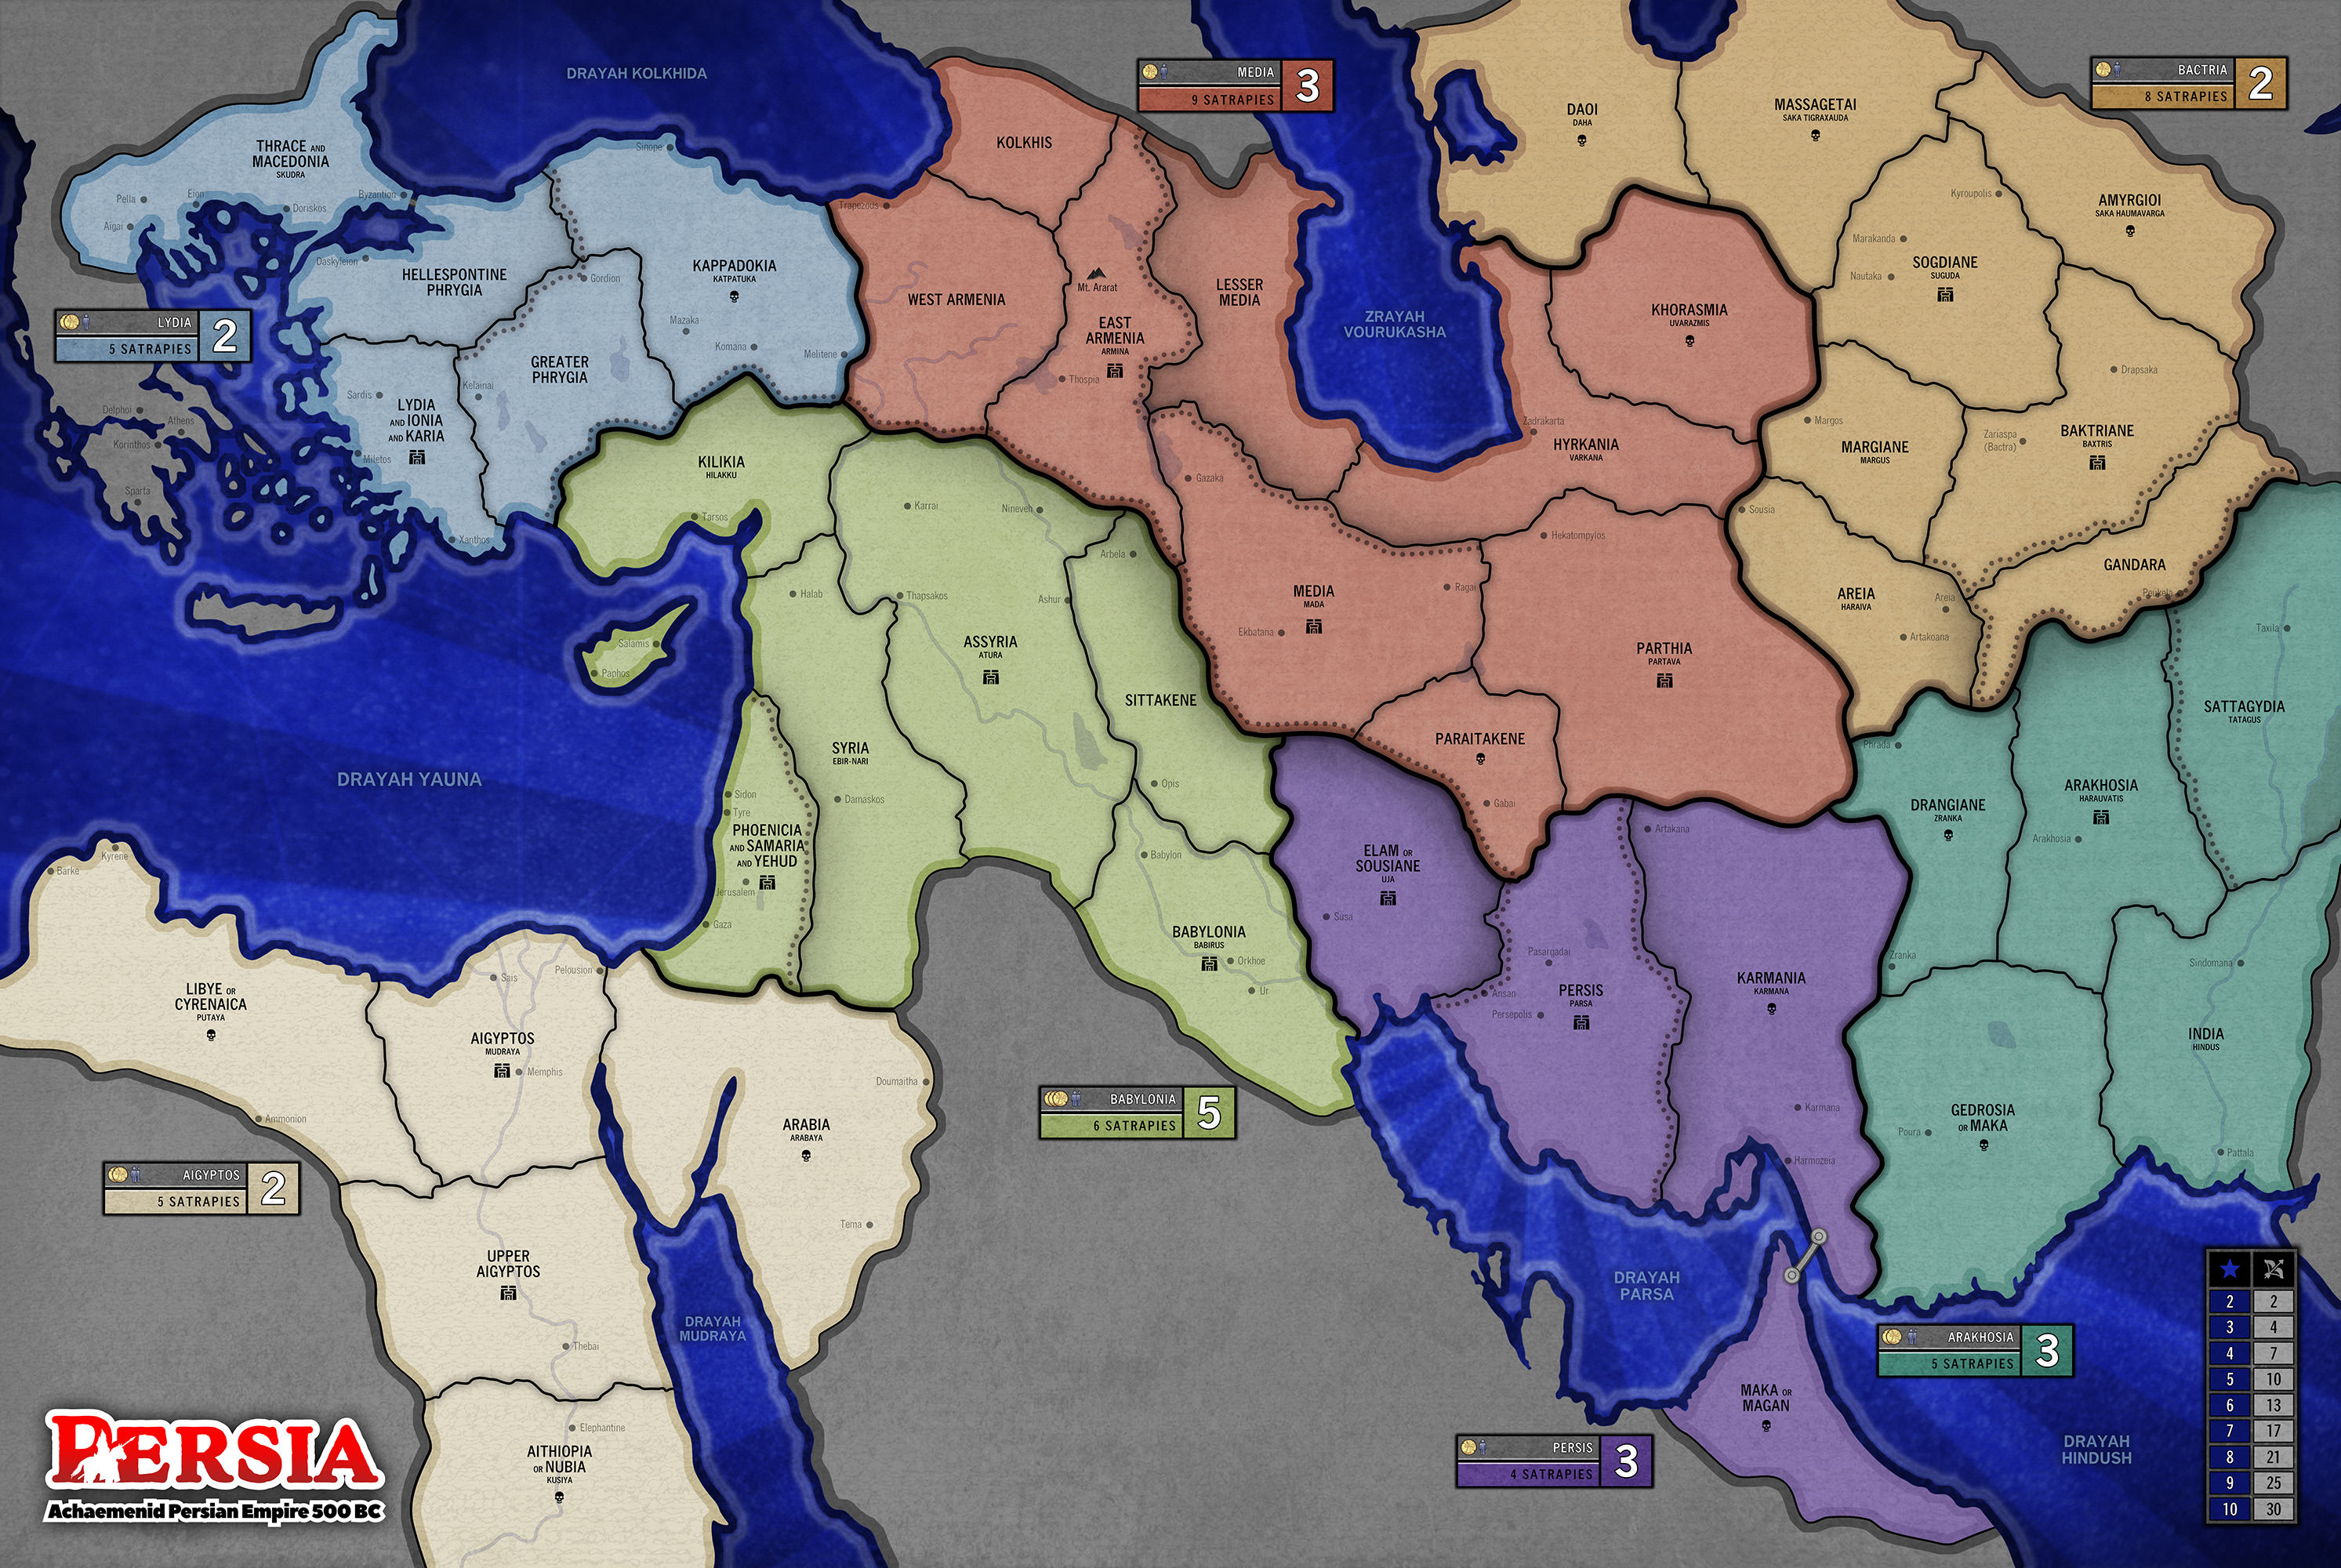
Persian Empire, around 500 BC, split into 7 regions and 42 “satrapies”- the same count as normal Risk.
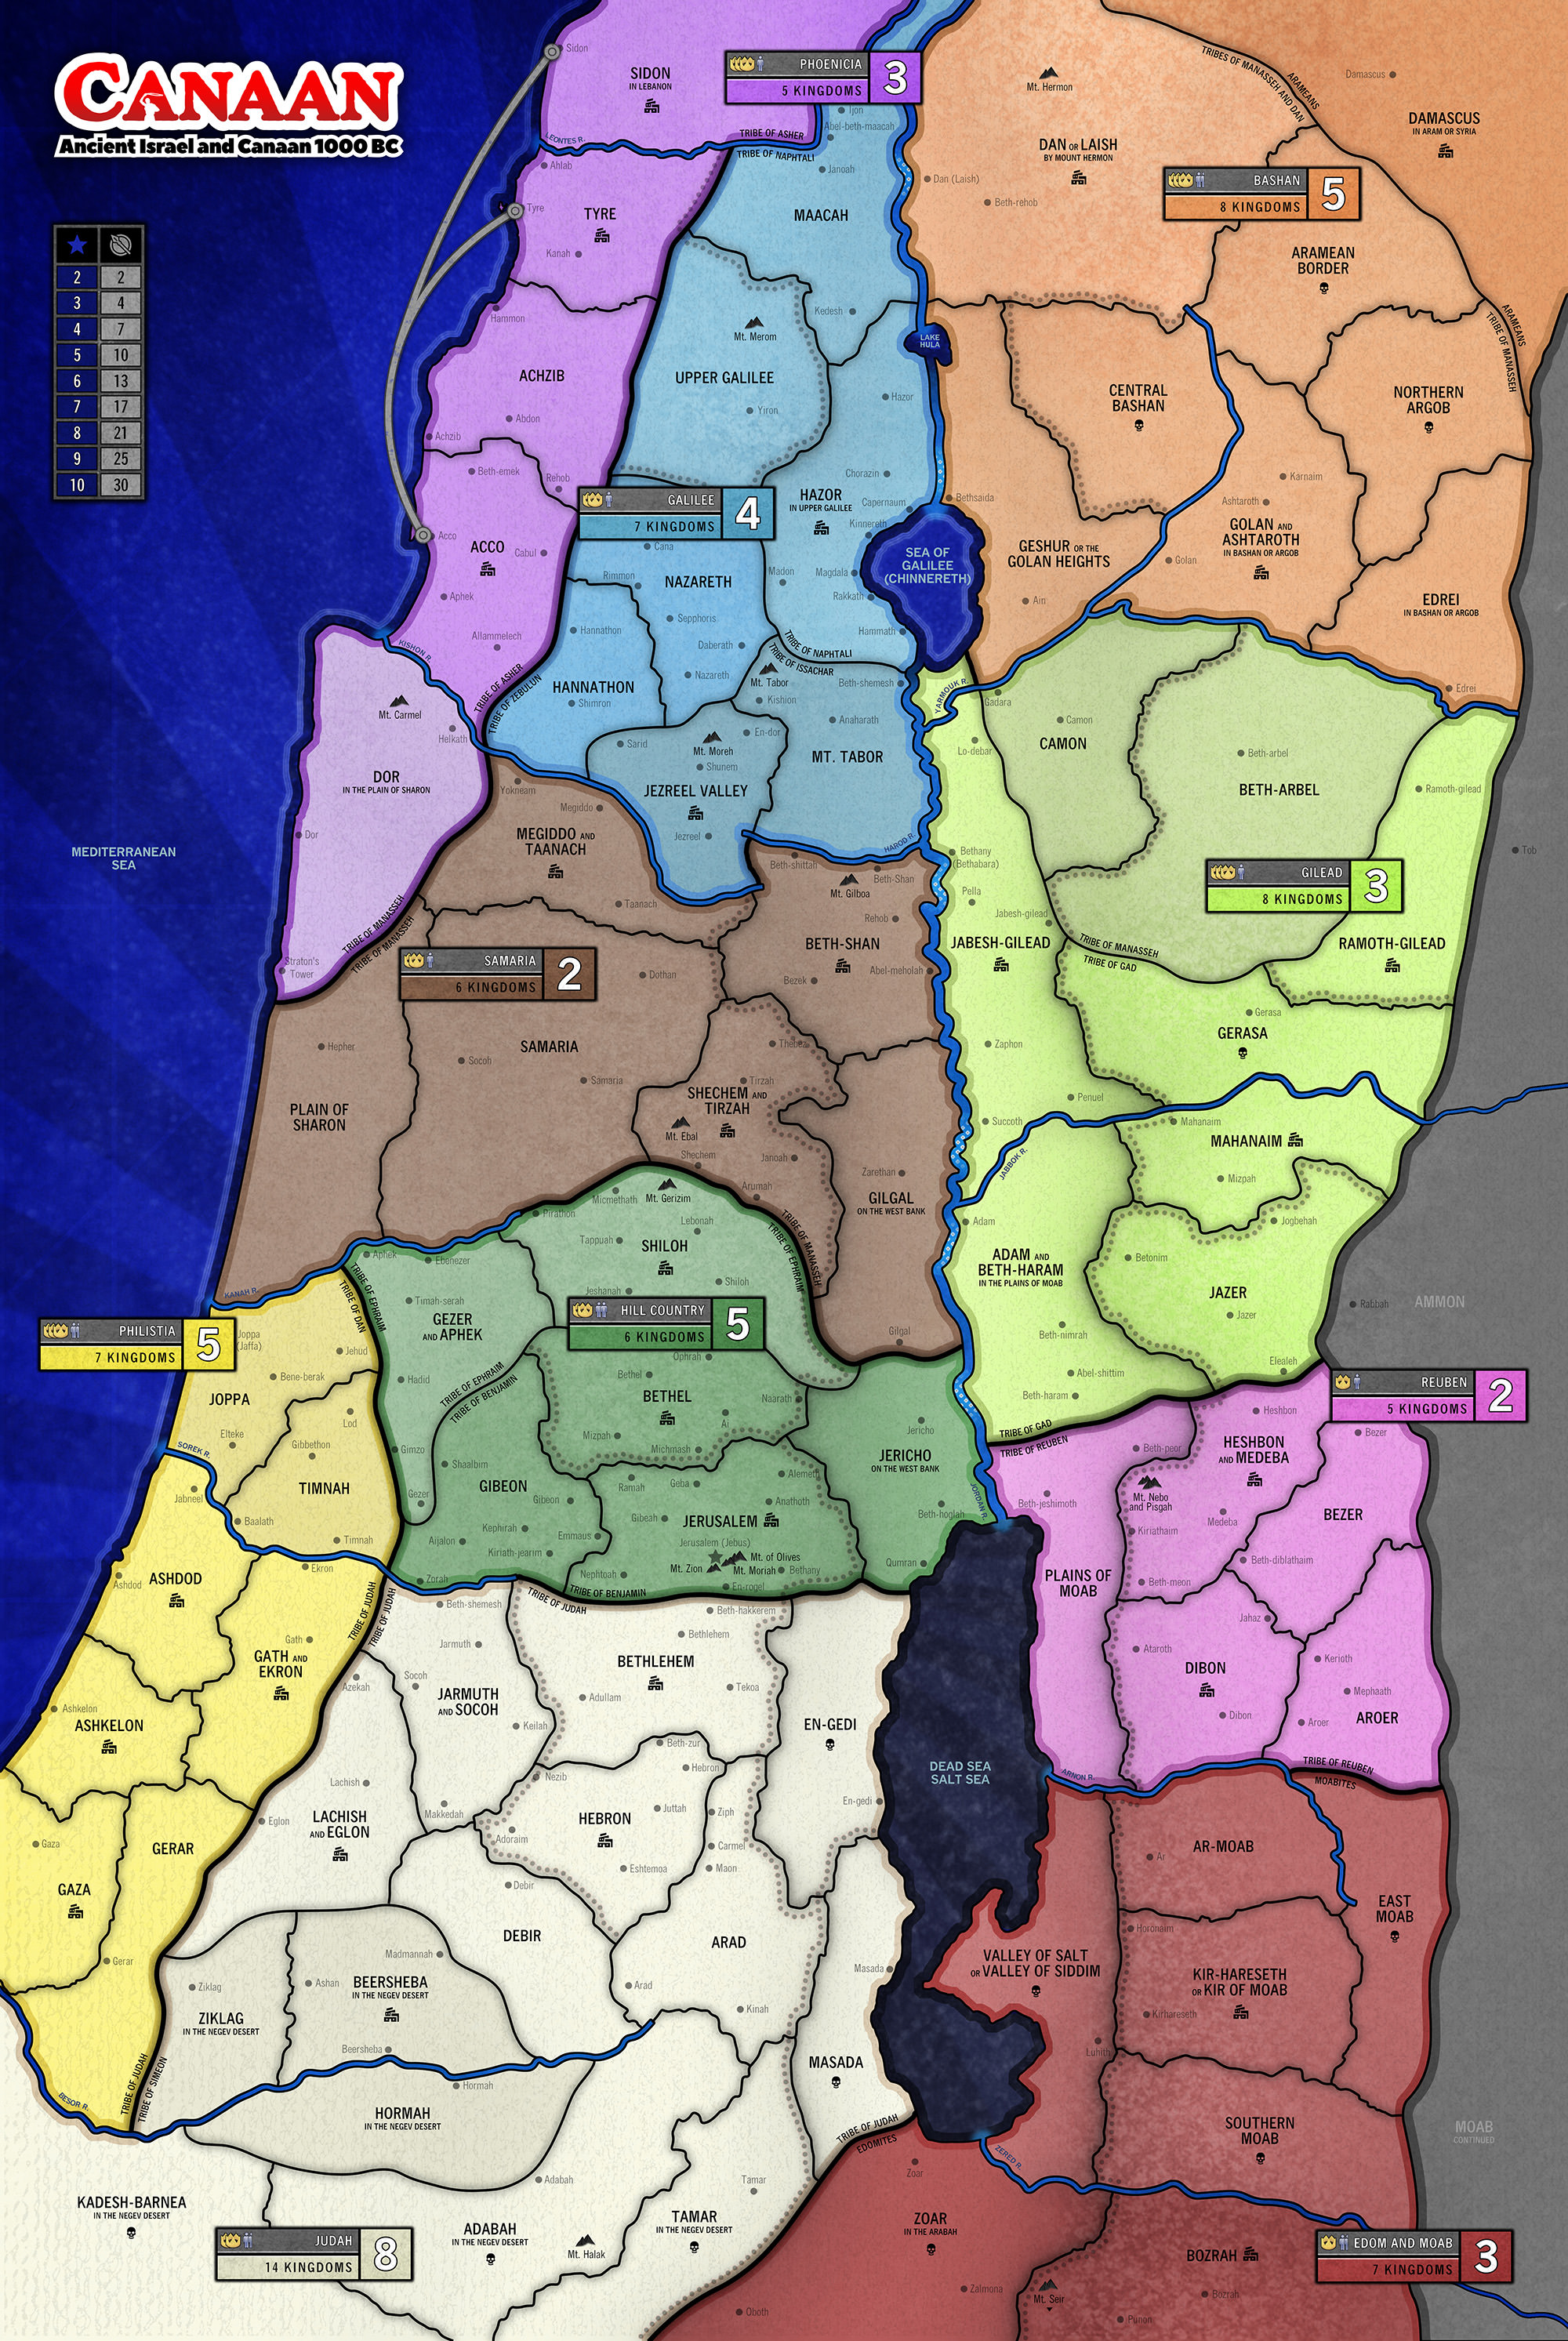
Canaan, 1000 BC
Territory Cards
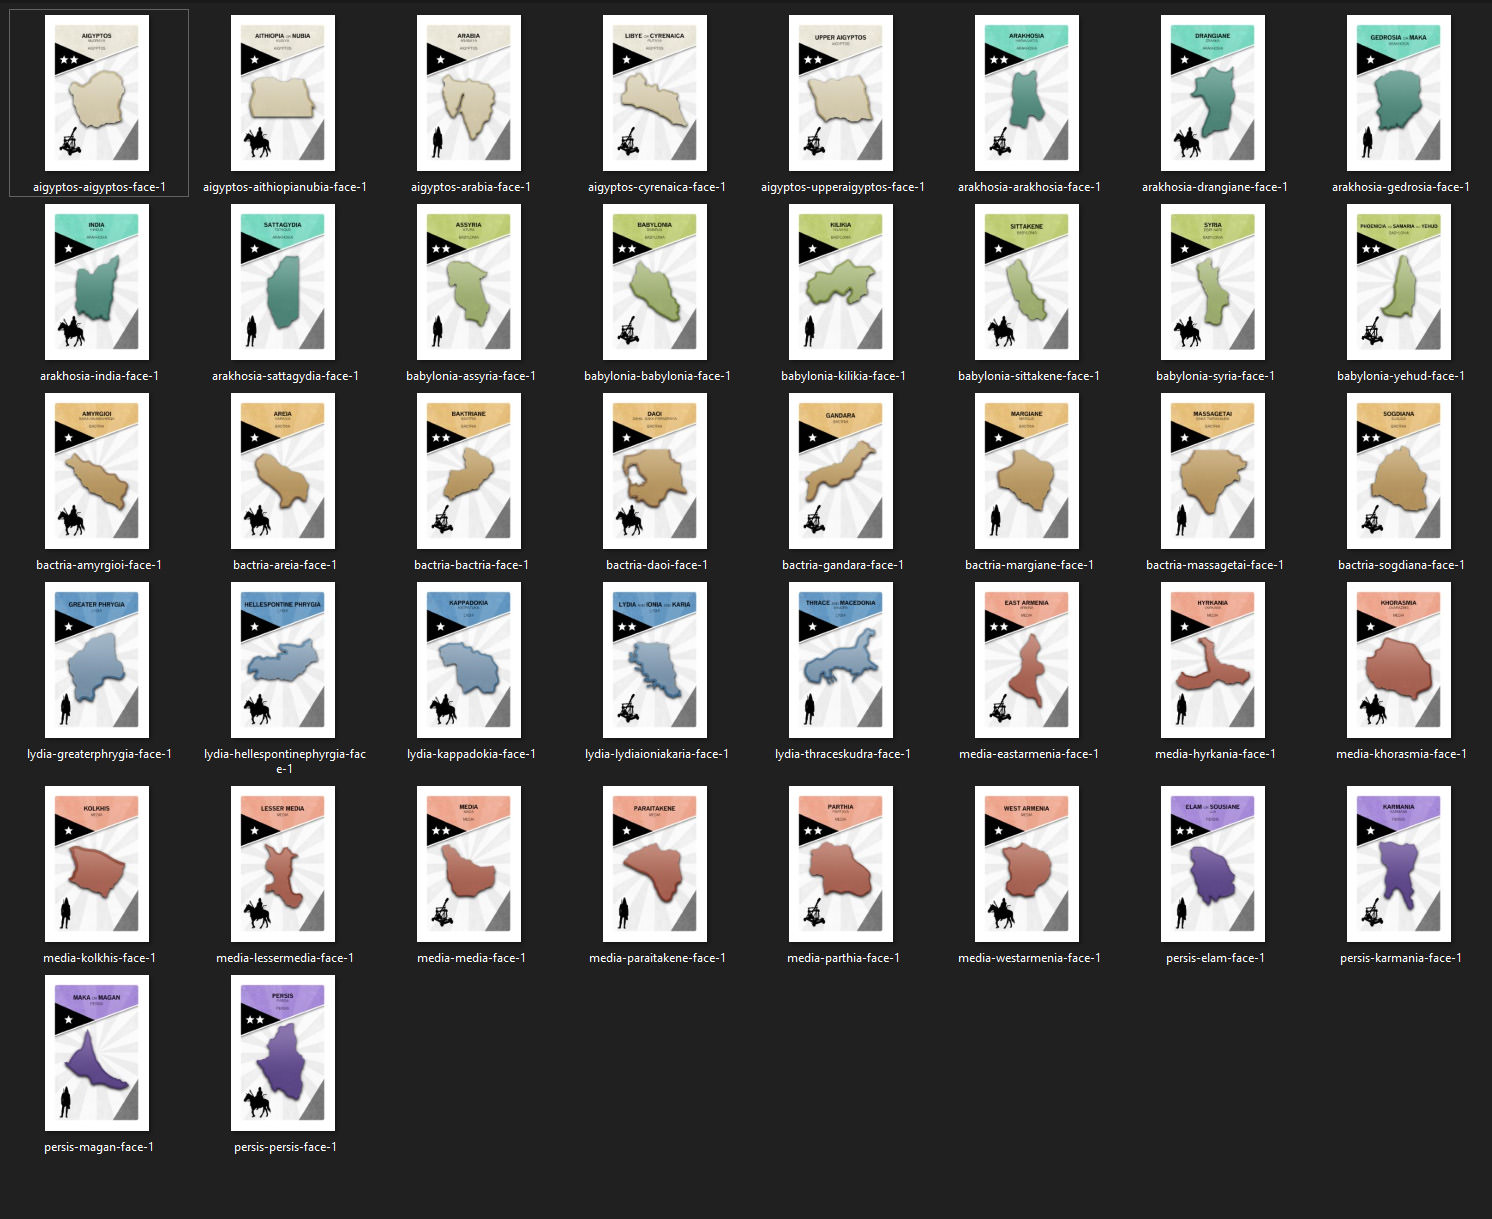
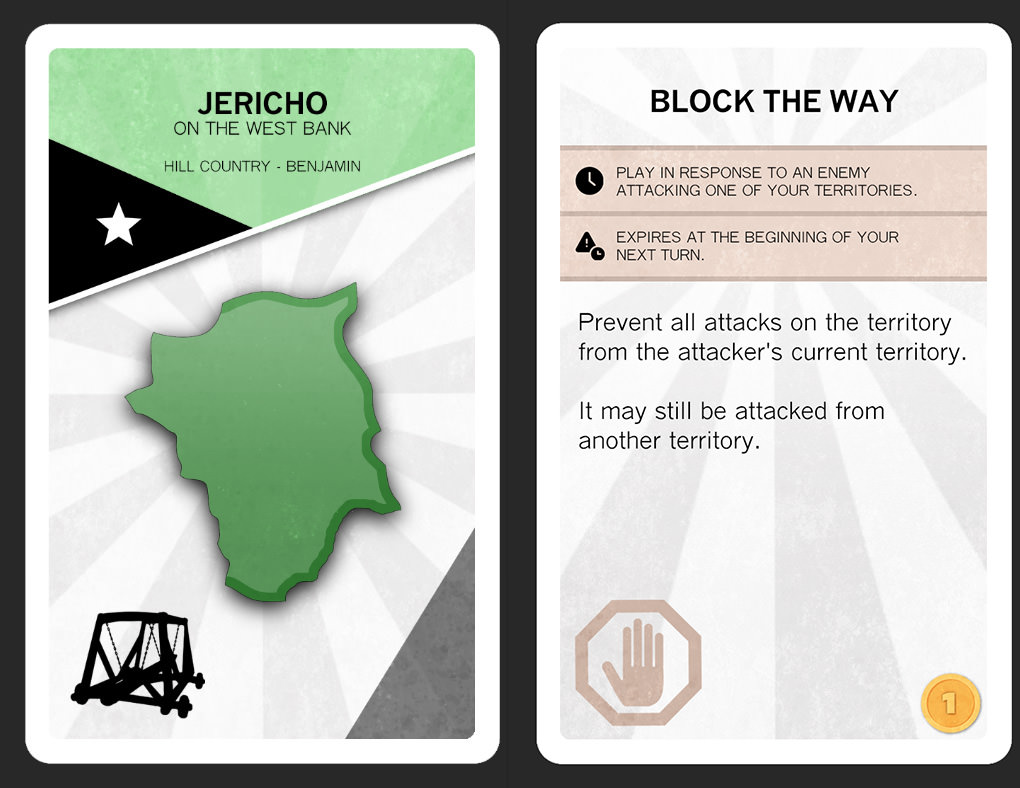
Each map has an accompanying deck of territory cards. Each territory card features 1 or 2 stars and an infantry, cavalry, or siege unit, making the cards compatible with either common style of turning in territory cards for troop bonuses. This leaves the choice to the gamemaster. Each map features a turn in chart for stars.
Action Cards
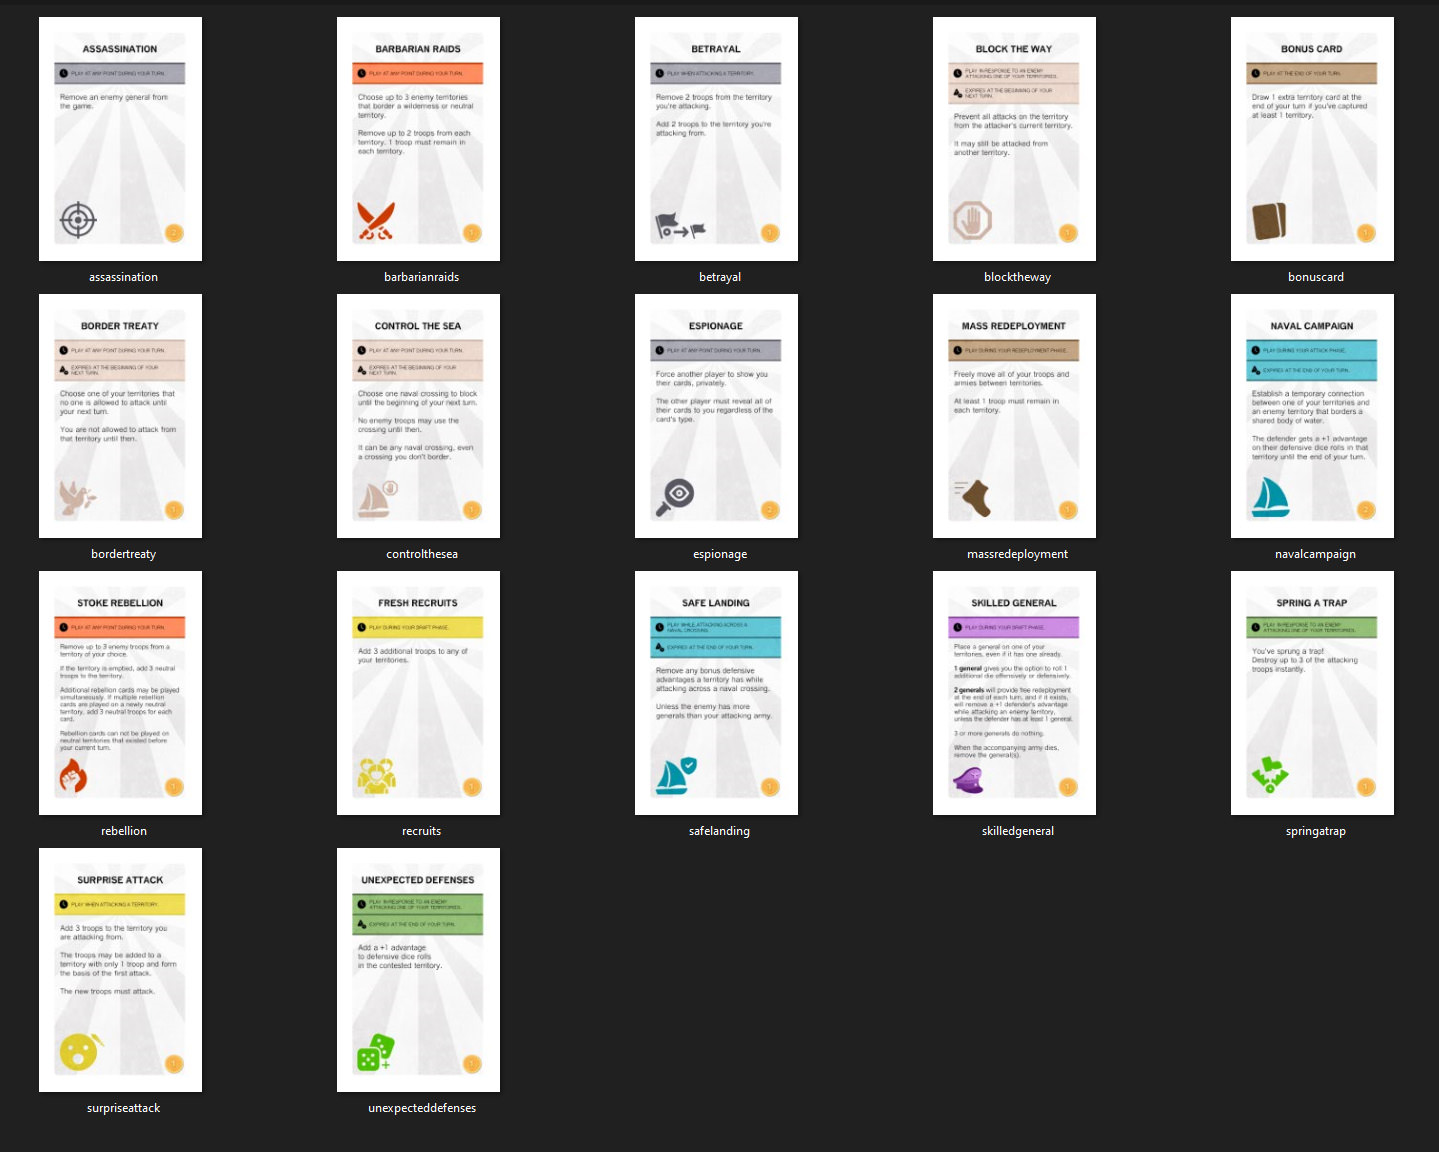
A single deck of action cards work well with each map and contribute to the new mechanics I experimented with. Action cards allow connections across territories that weren’t connected before, prevent players from attacking a specified territory, give bonus troops, assign leader units, and more. A player earns 1 action card per turn that they capture at least 1 city. No more than 1 action card can be acquired per turn. More about cities below.
Rules
I won’t get too far into the specifics of the custom rules, as they are still experimental and may be changed, but I will touch on some of the important features.
Winning the Game
Players win the game by owning 10 victory points for an entire turn. Each region that a player controls gives a variable amount of victory points. These points are represented by coins on the Rome and Persian maps, and by crowns on the Canaan map. The player must control enough regions to give them 10 victory points and hold onto control of those regions until the beginning of their next turn. Alternatively, a player can win by controlling all enemy capitals for one turn or eliminate all enemy players.
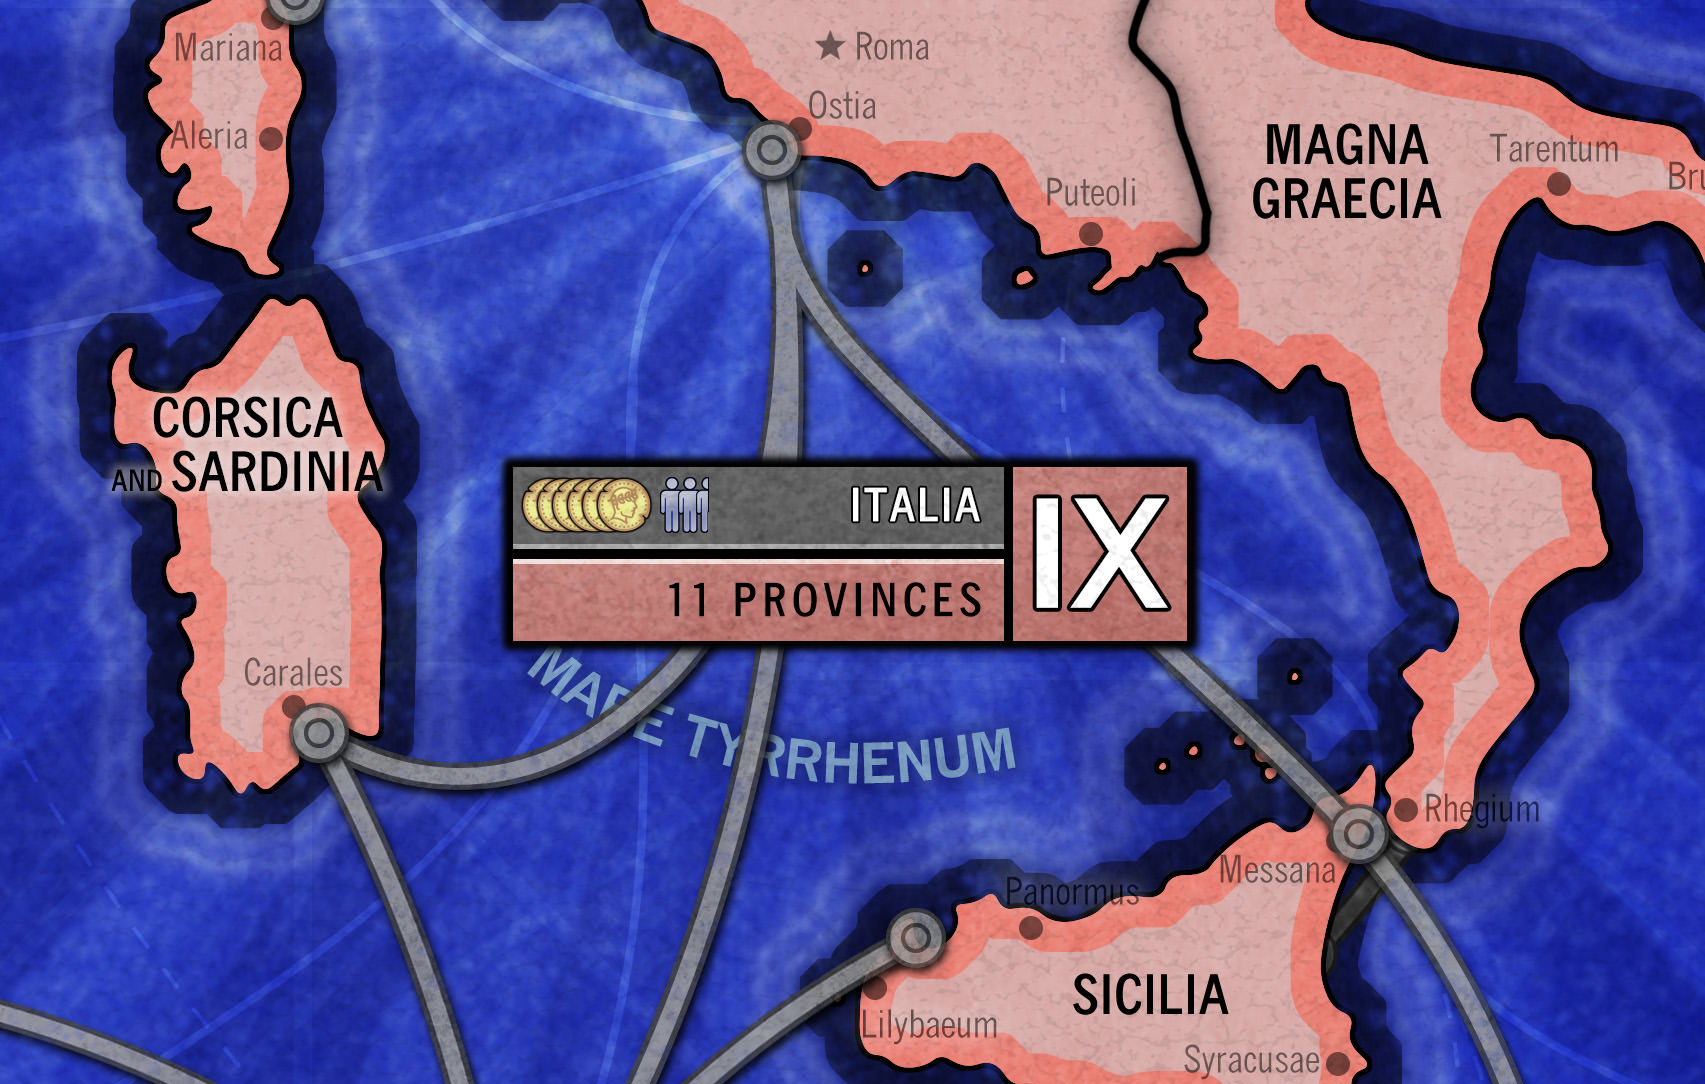
A region box showing the number of troops earned every turn for that region (9), the number of victory points for that region (6), and the number of barracks for that region (2.5).
Placement and Combat
Placing troops at the beginning of the game and engaging in combat is much the same as players would be used to in Risk, albeit with some modifiers in combat which will be explained below.
Cities, Capitals, and Barracks
Around the map, representing roughly 1/3rd of the territories on each map, are territories marked with a city icon. These city icons are not to be confused with the small circles which accompany real city names. Those are just for geographic interest and have no effect on gameplay. City icons do affect gameplay. At the beginning of the game, players have the option to place city game pieces on these territories to make them easier to track. Either way, city territories not only represent regions of the map which were particularly prosperous at the time, but also provide +1 troop per turn to the player who owns the territory. This is important, because unlike in Risk, troops are not awarded by counting the territories and dividing by 3. A player gets troops by controlling their capital, controlling cities, controlling regions, and building barracks.
At the beginning of the game, each player chooses a city territory to be their capital and places the capital game piece of their color on that territory. It can not move until the game is over. As long as a player controls their capital, they own the right to earn a minimum of 3 troops per turn.
Each turn, a player places 1 barracks of their color on one of their territories. Up to 2 barracks can be placed in 1 territory. If 2 already exist in a territory, the player must place the new barracks in a new territory. A player earns +1 troop for each barracks they have on the board. As the turns progress, players who successfully defend their barracks and cities, will have a larger and larger recruitment force per turn. Additionally, controlling a region gives the controlling player the ability to place more barracks per turn. A player controlling Italia in the example above, would be able to place 3 barracks per turn. That’s their default 1 + 2.5 from controlling the region. If a player controls another region that has half a barracks assigned to it, then the two halves form an extra barracks. Hispania (1.5) and Italia (2.5) for example, give the controlling player the ability to place 5 (Default 1 + 1.5 + 2.5) new barracks per turn.
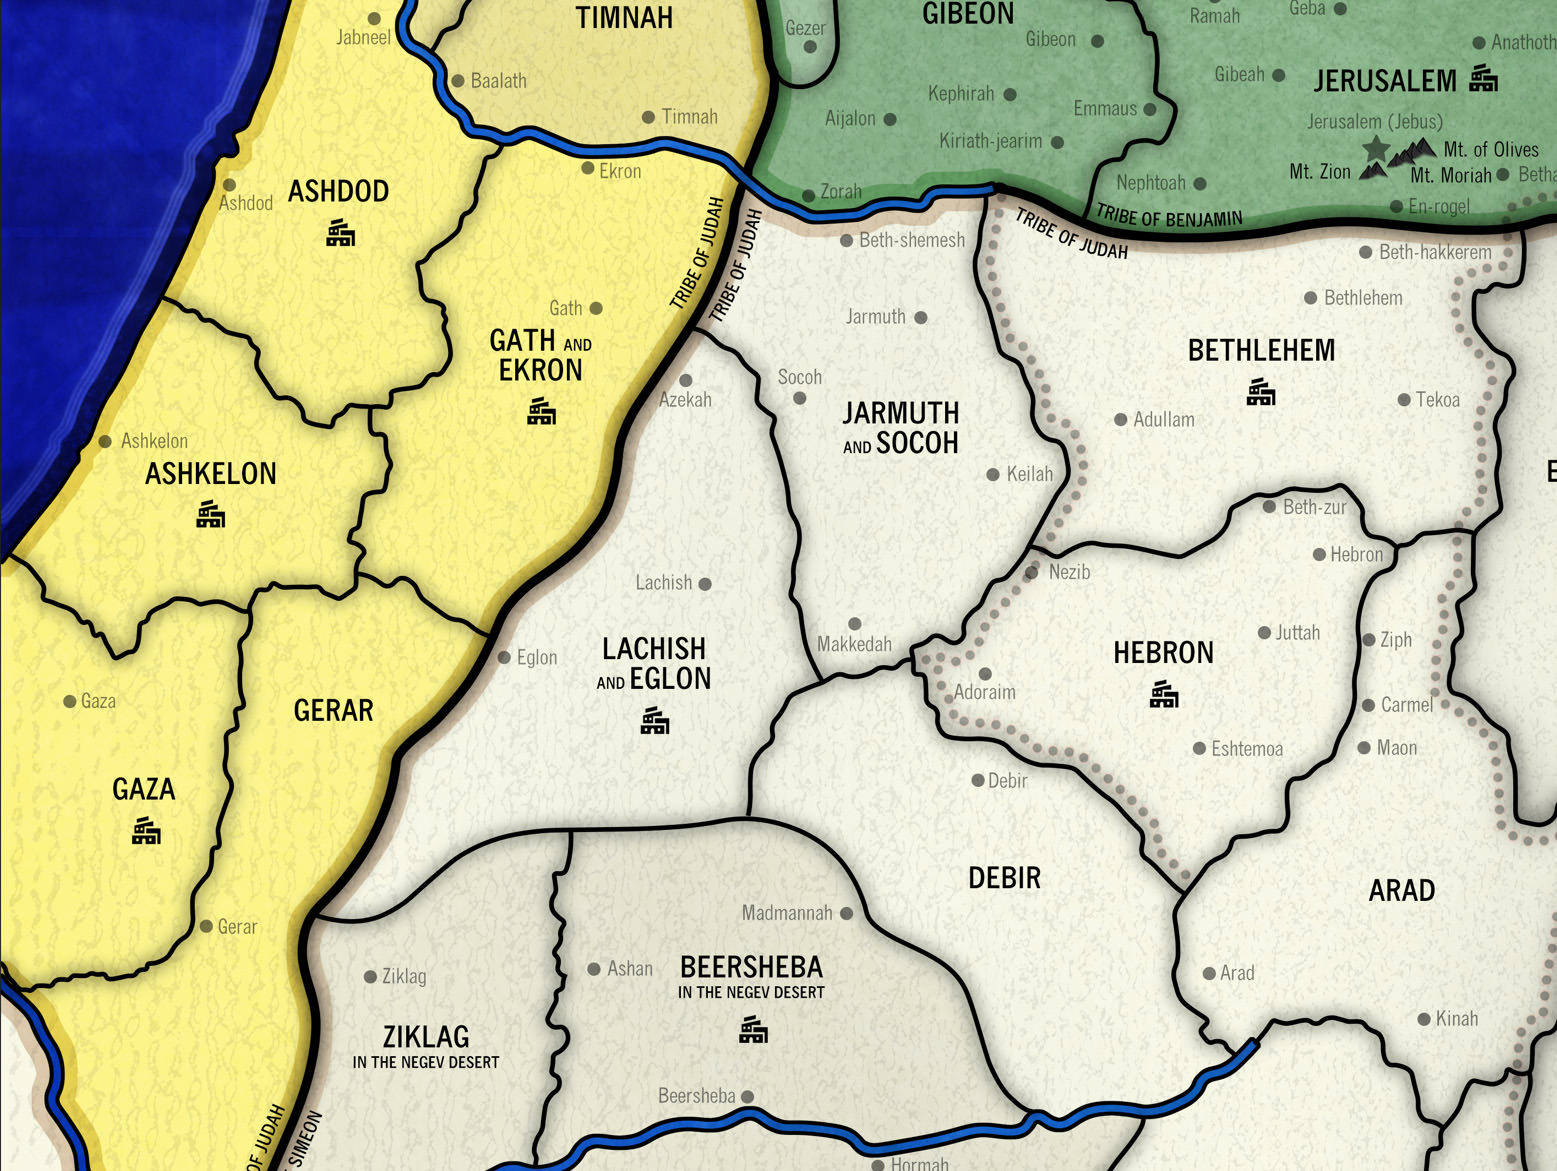
Gaza, Askelon, Ashdod, Gath and Ekron, have 4 city icons on them, making Philistia a powerful source of new troops (+4) from cities alone. These 4 territories, named after 5 cities, represent the 5 major Philistine cities referred to as the Philistine Pentapolis.
Desolate Territories and Natural Barriers
Many territories have skull icons on them, representing that they were areas of the world which were or are difficult to cross, navigate, or survive in. Desolate territories may be attacked and passed through just like any other territory, but players who control these territories may only station 3 defenders at a time on them, representing the difficulty of supporting large armies for long in the area. In effect, this makes desolate territories on the border of a region, vulnerable attack paths. However, defenders of a desolate territory do receive a defensive bonus of +1 the value of their dice rolls. That means if an attacker rolls a 6 and a defender rolls a 5, the defender wins due to the tiebreaker rule being in their favor and rolling a value of 5 + 1. The attacker must remove a troop.
Desolate territories often coincide with difficult to cross borders such as mountains and canyons. In my custom boards, dotted lines along the border of a territory represent a natural barrier such as mountains. Some borders have dotted lines on either side of the border, in both touching territories, but most borders that have natural barriers feature the dotted line only inside of 1 territory. Having a dotted line on the side of the border you control is good, having it on the side the enemy controls is bad. Defenders being attacked by an army on the other side of the natural barrier receive a defensive bonus of +1 to the value of their dice rolls. To be clear, they only receive the bonus if the dotted line is inside the territory that is being defended and the attacker is attacking from a territory across the barrier. In the image above for example, defenders of Hebron receive a +1 advantage if being attacked from Debir, but not if Hebron is being attacked from Arad. In addition, Debir receives no defensive advantage if being attacked from Hebron since the benefit of the natural barrier is on Hebron’s side of the border.
In maps where a river cuts through the map and forms the border between two territories, both sides of the river receive the defensive advantage of +1 to the value of the dice roll. On the Rome map, this is clearly marked with a dotted line on both sides of the Danube and Rhine, but on the Canaan map, the dotted lines on either side are not present, but the rule remains the same.
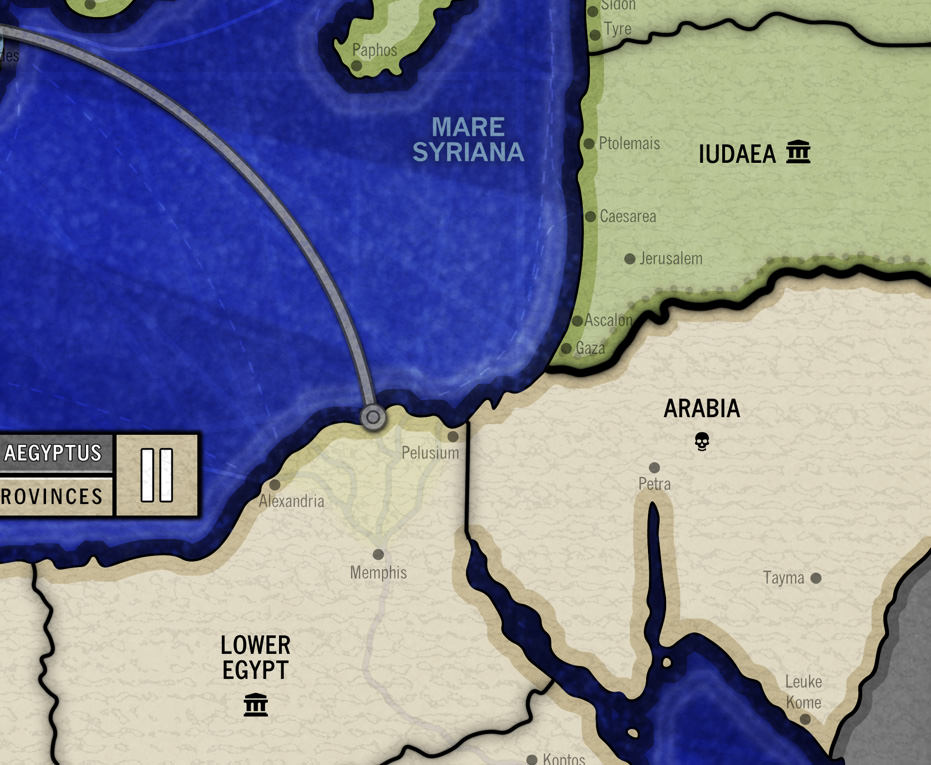
In this example, Arabia is a desolate territory. Only 3 defenders may be stationed here, but they receive a +1 defensive advantage. The hill country of Iudaea is difficult for Arabian attackers to attack into, so they receive a +1 advantage.
Naval Crossings
Naval crossings represented by grey lines and circles (ports and landings) allow travel between two territories connected via the water. There are no advantages of disadvantages of attacking via a naval crossing other than they may serve as a means of bypassing natural barriers such as mountains. If a player controls an entire region, then they receive a defensive bonus of +1 the value of their dice rolls when defending against a naval attack. At most, a defending player may receive a +2 advantage from any combined bonuses.
Leaders
A handful of action cards in the action card deck give the player a Skilled General. Skilled Generals accompany the army and give the player the option to roll 1 additional die offensively or defensively. If they have 2 generals with the army, that army gets free redeployment at the end of the turn and will remove a single +1 defensive advantage in a territory the player is attacking, so long as the defender does not have at least 1 general. More than 2 generals with the army do nothing.
Unique Terrain Features
The maps have different unique features. For example, Rome and Canaan have rivers which provide a defensive advantage to defenders of either side of the river. The central Jordan River in Canaan is impassable except at certain fords specified by white circles bridging the river. All maps feature important rivers and mountains lightly visible.
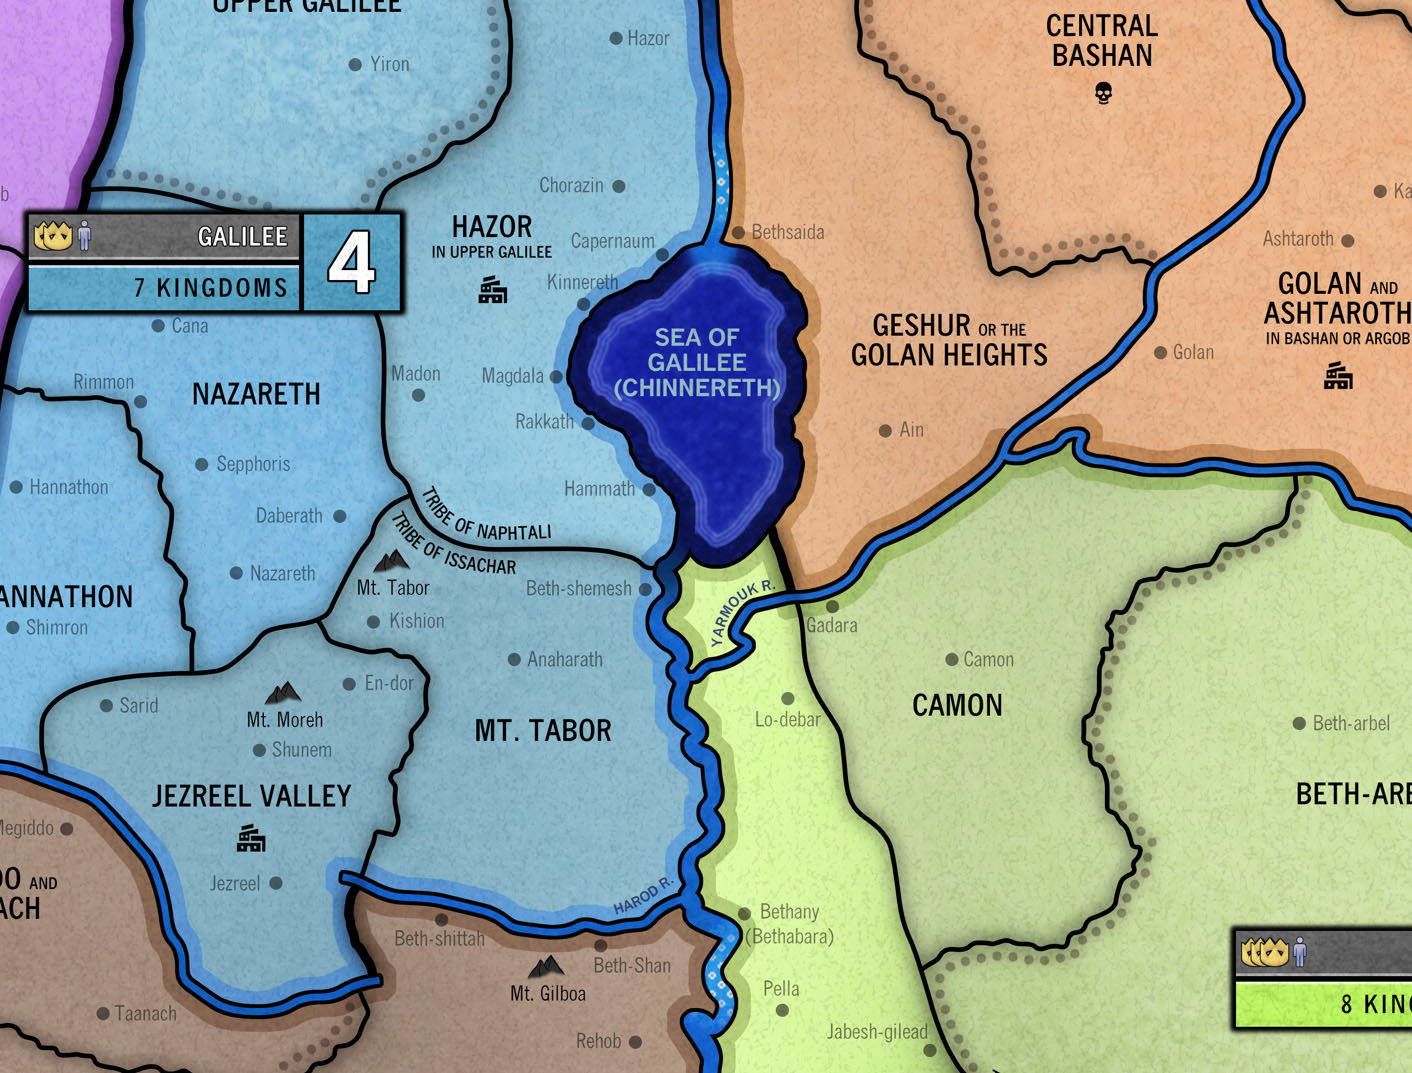
The Jordan can only be passed at fords, represented by light circles. Hazor and Mt. Tabor can’t attack Jabesh-Gilead (Lime Green) despite bordering it. Attackers from Galilee must go through Geshur in the north or Beth-Shan in the south by Bethany, in order to attack.
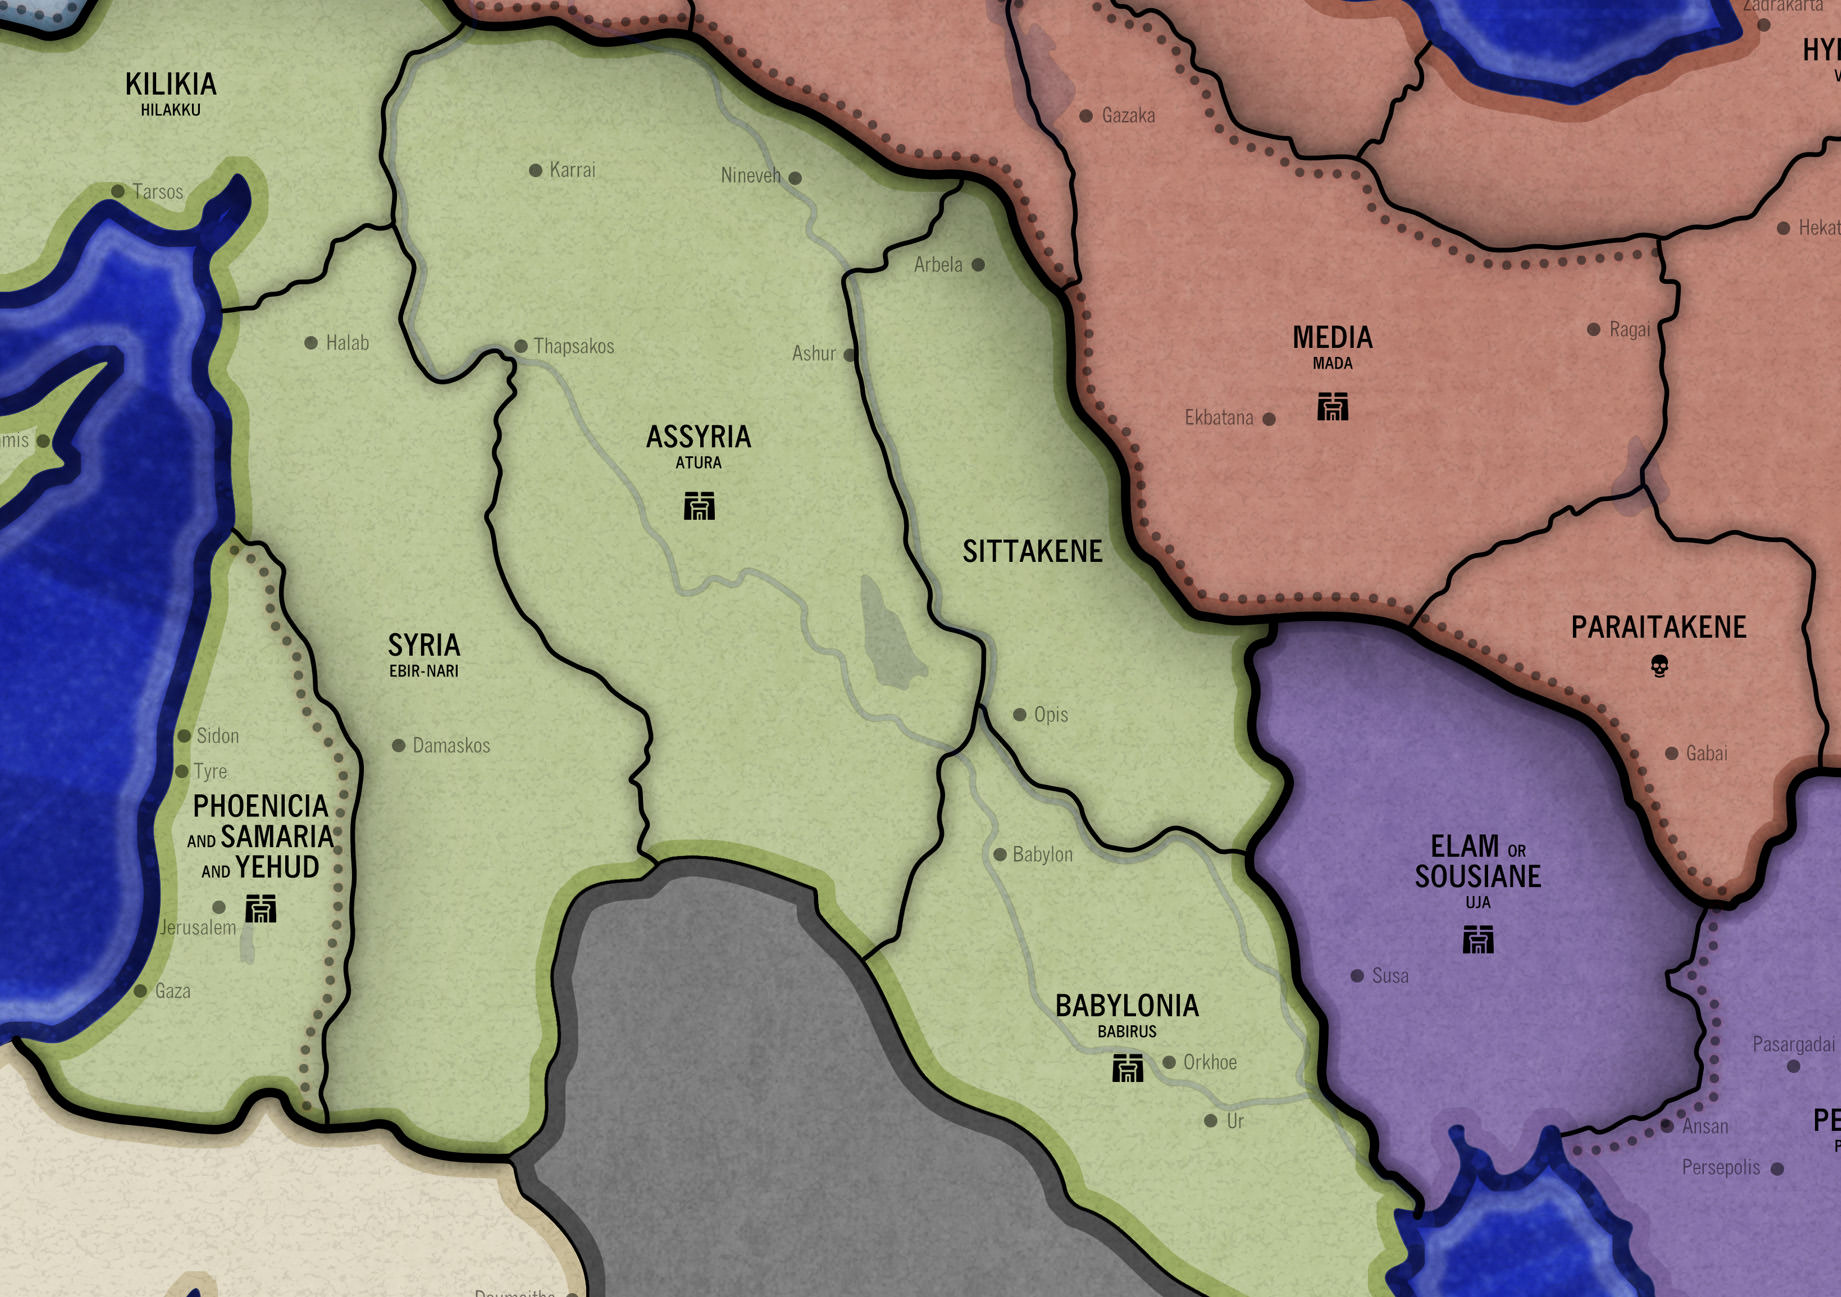
Note the less visible presence of the Euphrates and Tigris rivers cutting through Babylonia and Assyria. Take note also of the shadow cast by Media and Paraitakene. These shadows represent that those territories have a higher elevation than their neighbors.
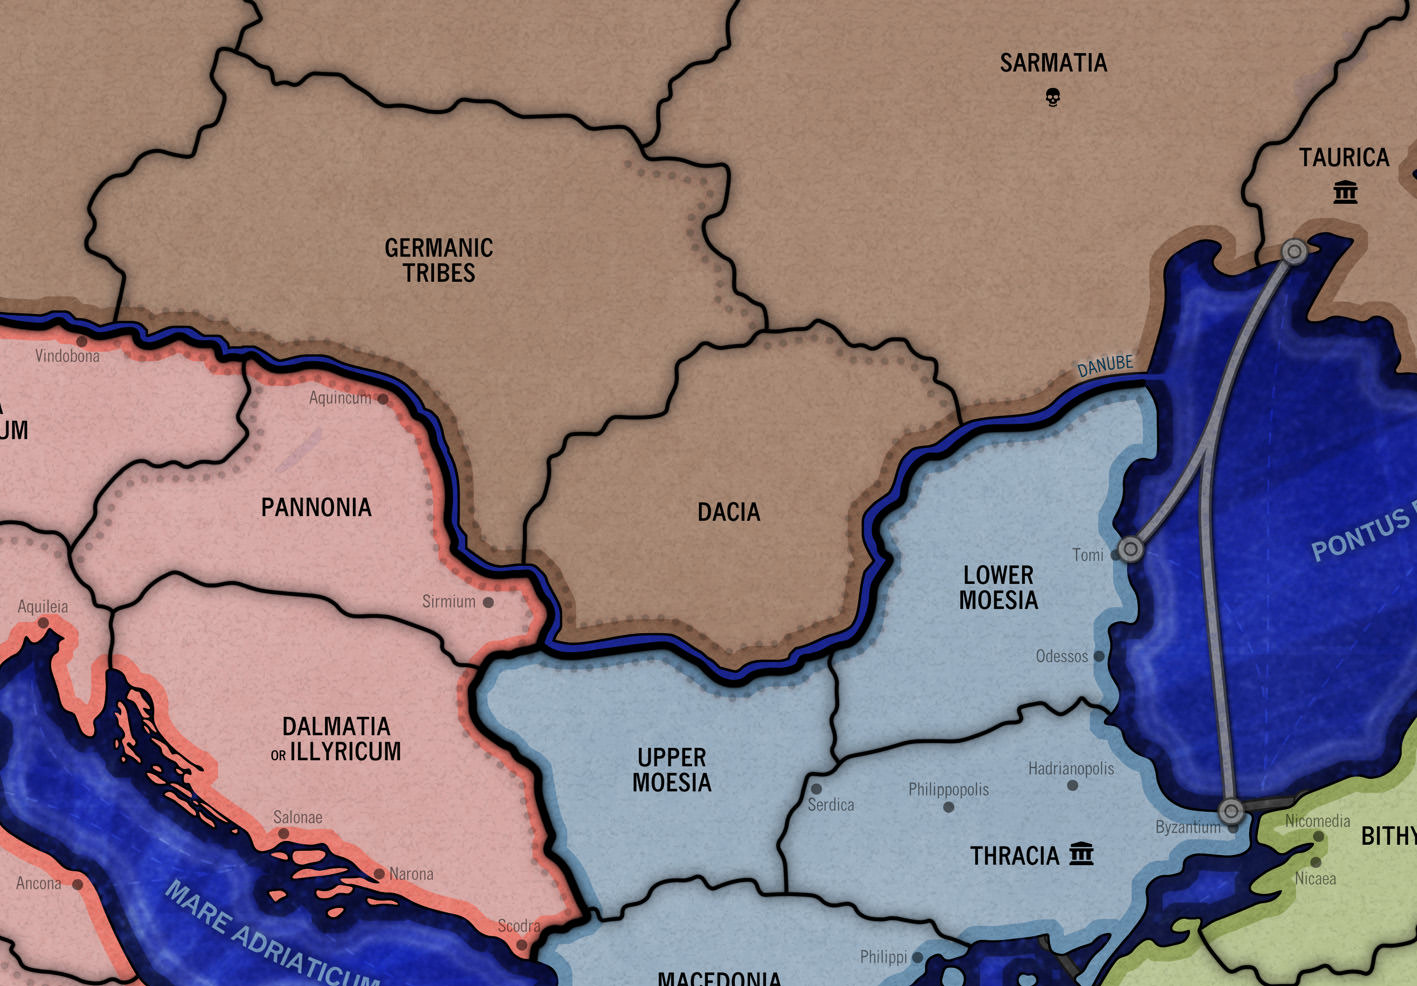
The Danube, one of the most important borders of the Roman Empire. The Danube separated the empire from the Barbarian tribes of Germania and Sarmatia, requiring constant reinforcement and patrol. It’s importance is exemplified by the fact it cuts through the map.
Other Art
The logos of the different maps, featuring silhouettes in the name, without using the Risk trademark.
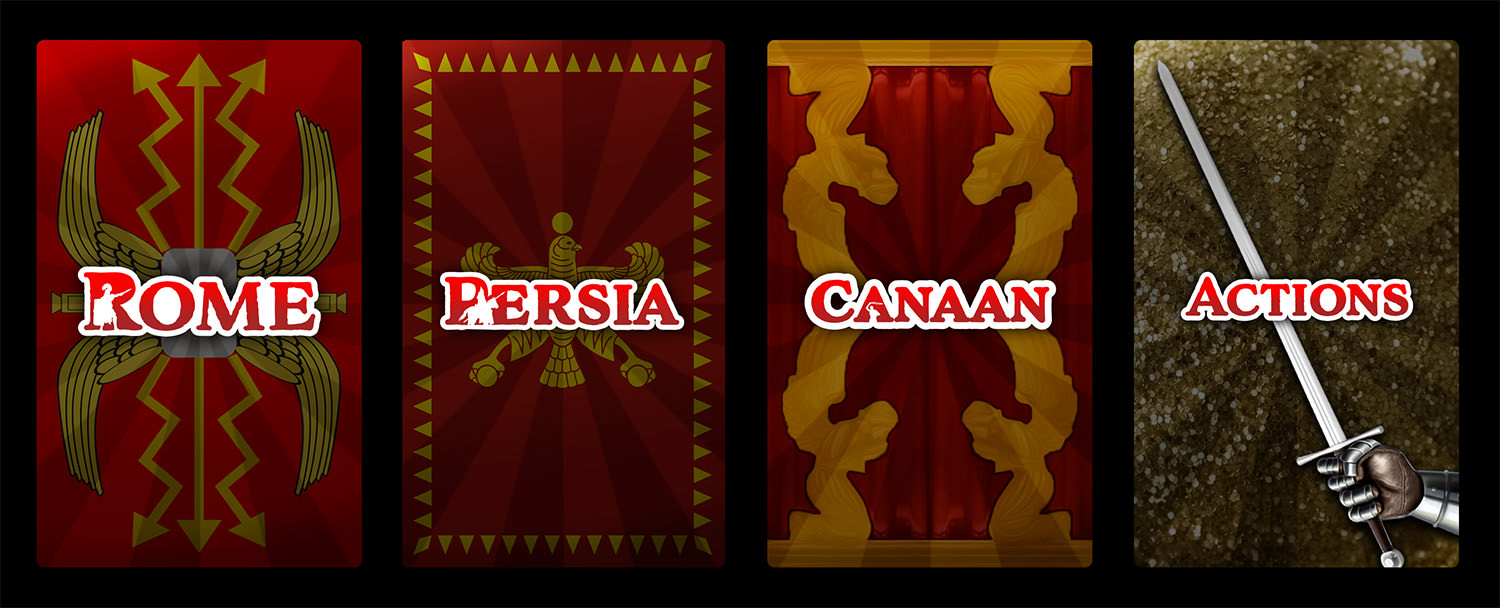
The backs of the territory deck cards and the back of the action deck cards. The territory cards each feature recognizable symbols from the era. Rome: Legionary Scutum. Persia: Achaemenid Flag. Canaan: Ark of the Covenant.
To see development projects, check out Versatile Shipping, or Secure Contact Forms.
For gaming, check out Ant War or Ages Reformed.


